Quick Start — From One Image to a Sprite Sheet in 5 Minutes
The core GenioPlus flow is simple: one character image → AI animation video → keyframe extraction → sprite sheet. If this is your first time, follow this guide once — in about five minutes you'll have a transparent PNG sprite sheet ready for your game engine.
Step 1 — Upload a character image
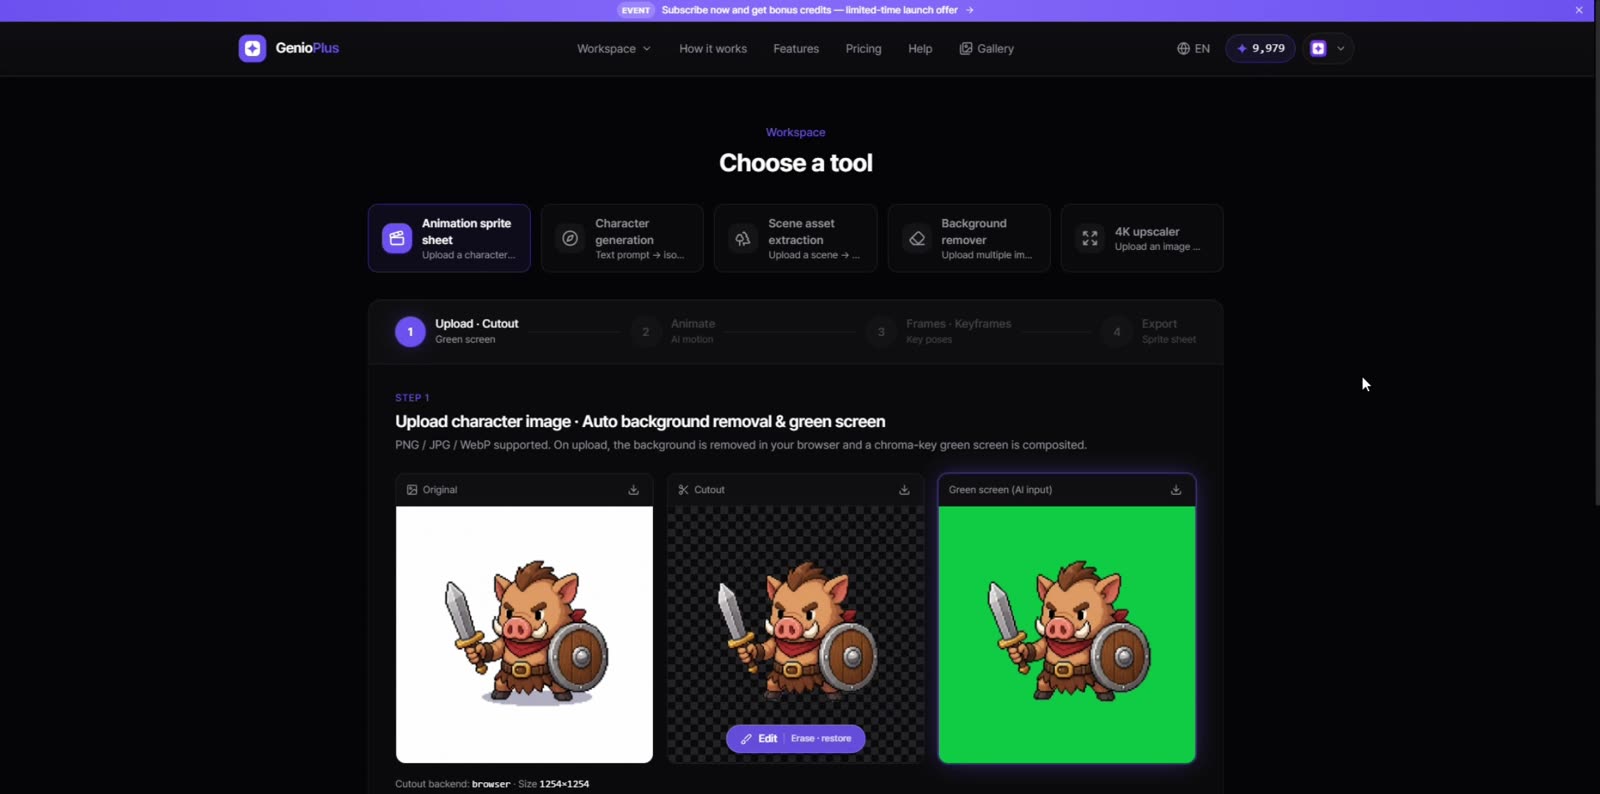
Open the "Animation sprite sheet" tool in the workspace and drag in a character image (PNG/JPG/WebP). The background is removed automatically in your browser and a green screen is composited for the AI. A full-body illustration with a clear subject and simple background works best.
Step 2 — Pick a motion and generate
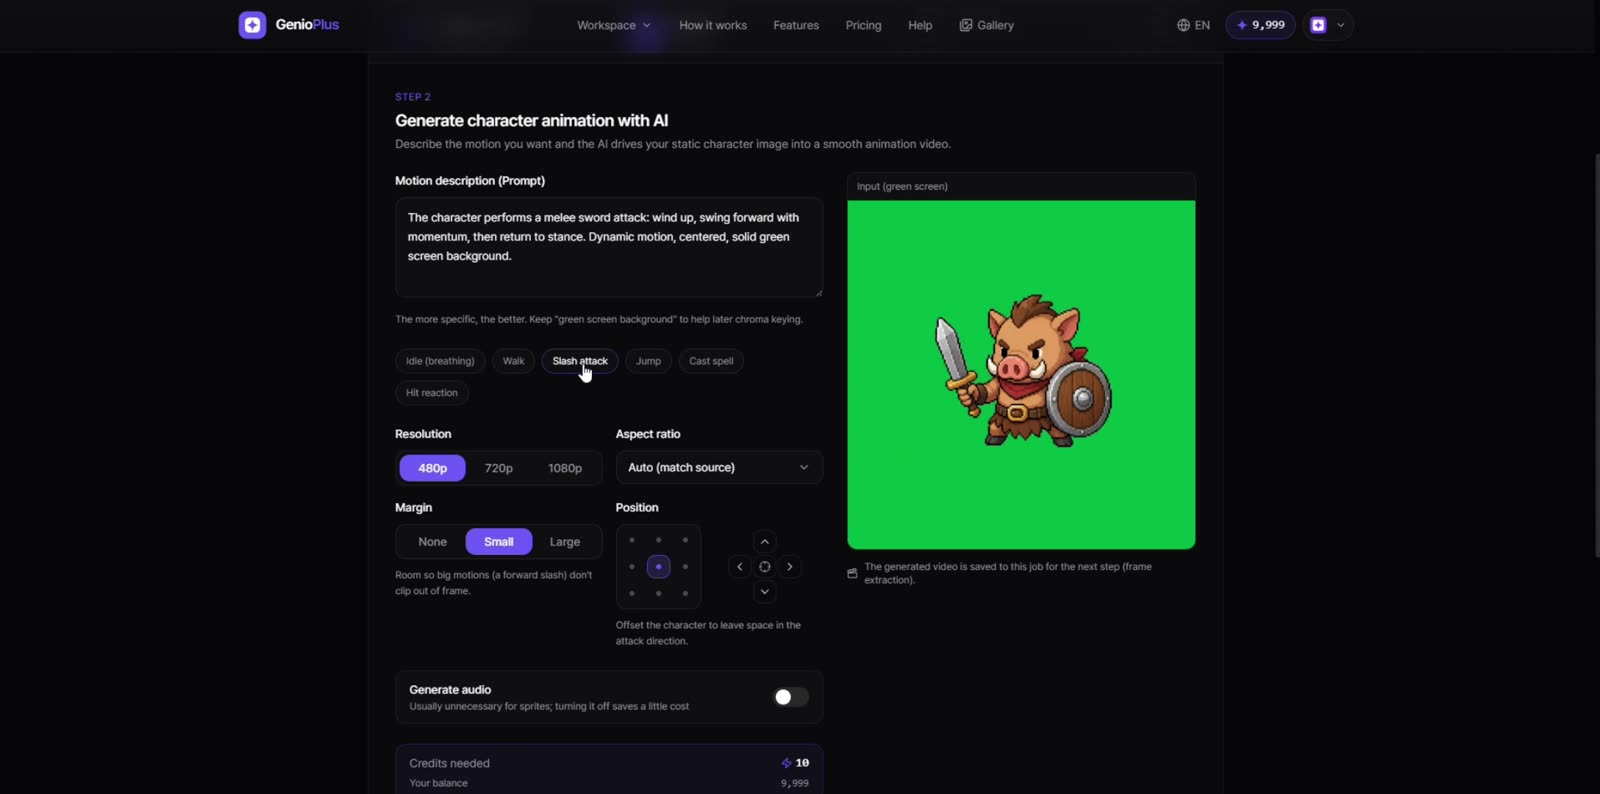
Click a preset like "Idle (breathing)", "Walk", or "Slash attack", or describe the motion yourself. Keep "green screen background" in the prompt so the background keys out cleanly later. Hit "Generate animation" — the AI renders the video in 30–150 seconds.
Step 3 — Extract frames and pick keyframes
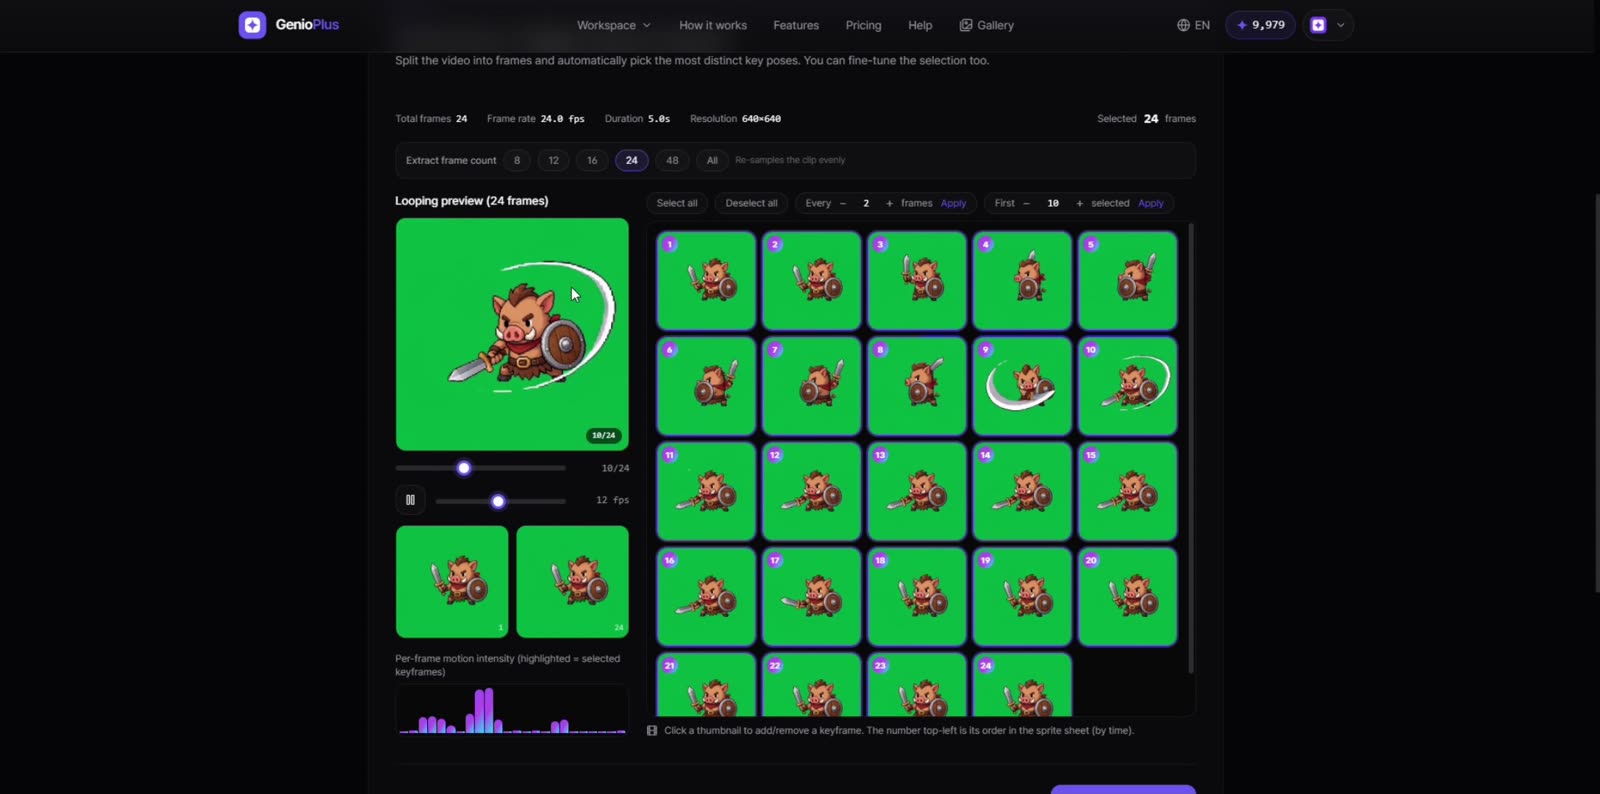
Click "Extract & analyze" to split the video into frames; the most distinct key poses are selected automatically. You can click thumbnails to add or remove frames, but the automatic selection is a good starting point.
Step 4 — Remove backgrounds and export
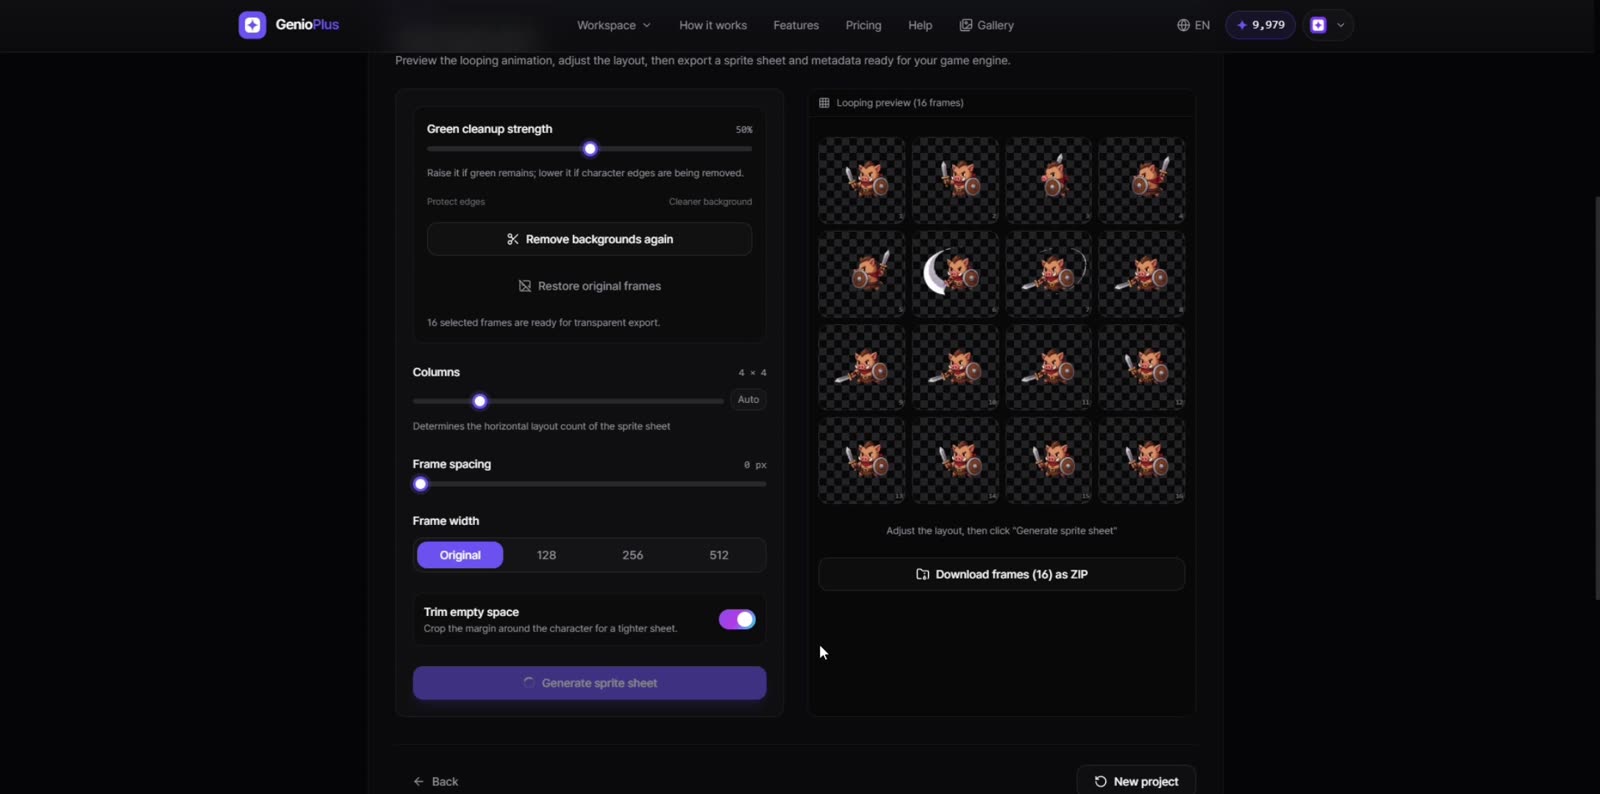
Use "Remove selected backgrounds" to key the green screen to transparency, then click "Generate sprite sheet". You can download the sprite sheet PNG, the individual frames as a ZIP, and a metadata JSON with frame sizes ready for Unity or Godot.
Where to go next
The full "Animation sprite sheet guide" covers every option in detail — cutout editing, prompt tips, keyframe strategies, and layout controls. Don't have a character image yet? The "Character generation" tool creates one straight from a text description.
Ready to try it yourself?
Open the tool