Swap Weapons on a Sprite Sheet Without Redoing the Animation
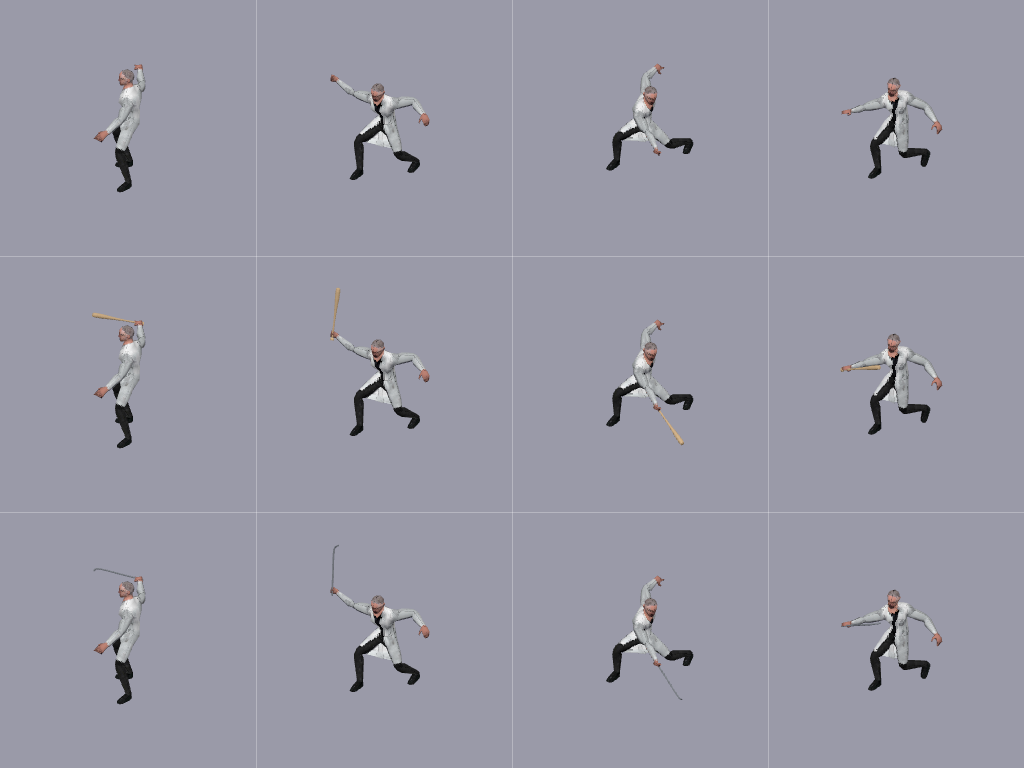
Say you have an attack animation with a baseball bat and want the same attack with a crowbar. In an AI-generated animation the weapon is part of every frame, so generating it again gives you a different motion. The way around that is to keep the character and the weapon as separate 3D models and let the weapon follow the hand. Changing the weapon then leaves the motion alone.
What you need
A rigged character as a GLB, and one GLB for each weapon. If you are starting from artwork, "T-pose & parts" redraws the character in a T-pose and gives you each weapon as its own image, and "Image to 3D" turns the body and each weapon into separate models. Convert them separately: a weapon converted together with the character fuses to the hand.
T-pose & parts uses credits. Image to 3D has a free option that runs in your browser, but long round props such as a bat can come out wrong with it, so check the weapon from the side. Everything from here on runs in your browser too and uses no credits.
Step 1 — Rig the character and pick the clips
Take the body through "Auto-skinning", then use the next-step button to reach the "Animation library". Tick the clips you want and continue to "3D → Sprite". The attack clips in the library, such as Sword_Attack, Sword_Regular_Combo and Melee_Hook, are one-handed swings with the right hand, which suits a crowbar or a bat held in one hand. There is no two-handed swing yet. If you need one, load your own clip under "2 · Animation file".
Step 2 — Add the weapons
Under "3 · Weapon", press "Add" and choose your GLB files. You can pick several at once. Each one becomes a card, and clicking a card puts that weapon in the hand. The length and the handle end are worked out from the model, even if it was exported at an angle, and the weapon starts at 45% of the character's height.
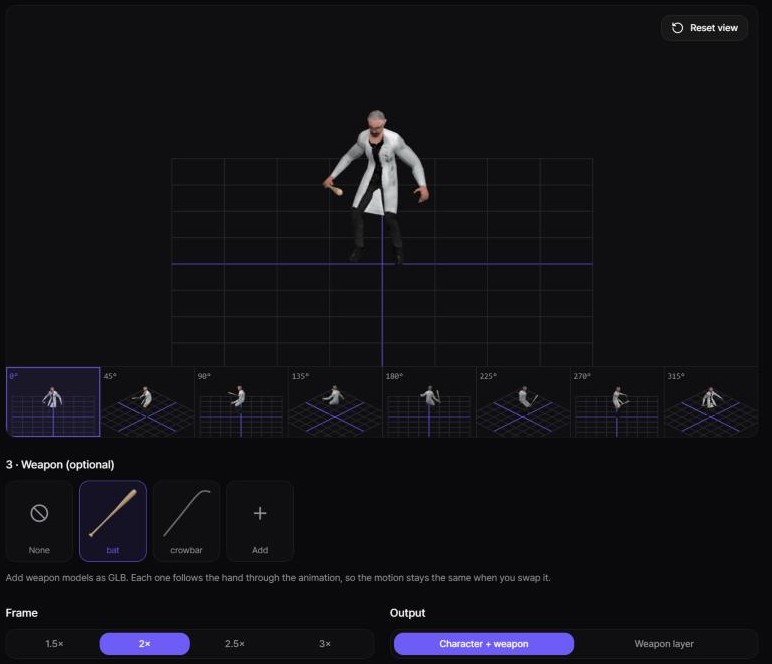
If the grip looks wrong, open "Adjust grip". Start with "Flip ends" if the weapon is held by the wrong end. Size, grip point and angles are set per weapon, and "Hand" moves it to the left hand. These settings last until you leave the page, so note them down if you plan to come back and add more weapons.
Step 3 — Set the frame once
With a weapon loaded, the framing locks to the character and cells are no longer trimmed. That is what makes the sheets line up, and it also means the character fills less of the cell: at the default 2× it is about half the cell's height, so 256px cells work best. If the weapon leaves the frame during the clip, a warning appears and a wider "Frame" fixes it.
Use the same frame, camera, cell size and clip for every sheet of a character, including any weapon you add later. Change one of them and the sheets stop lining up.
Step 4 — Render the sheets
The simple way is one full sheet per weapon: leave "Output" on "Character + weapon", render, pick the next card and render again.
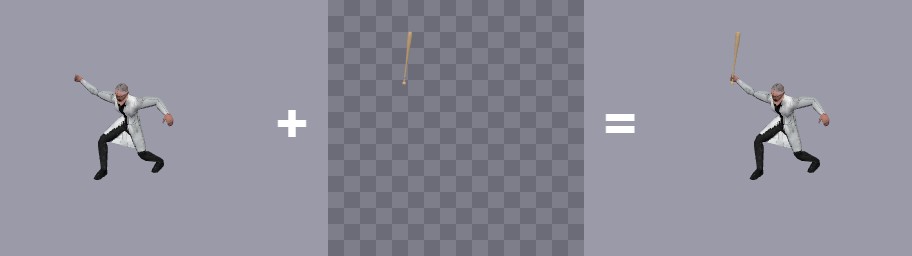
The lighter way is one character sheet plus one layer per weapon. Choose "None" and render the character. Then pick a weapon, set "Output" to "Weapon layer" and render. The layer holds only the weapon, already cut away where the body covers it.
Step 5 — Swap in your game
Draw the layer at the same position as the character and always show the same frame number on both. To change weapons, change the layer's texture; the animation code stays as it is. Hide the layer when the character is unarmed. Ten weapons then take ten layers, but only one set of character sheets.
Making a 3D game instead
You don't need sprites for this. Export the GLB from the "Animation library" and attach the weapon model to the hand_r bone in Unity, Godot or Unreal. Swapping weapons is then a matter of swapping that model.
What to expect
Nothing collides, so a long weapon can pass through the body in some poses; a shorter size or a different clip usually solves it. Fingers only close if the clip and the rig move them. A character rigged with its fingers merged into the palm keeps its hand shape, which rarely shows at sprite size.
Ready to try it yourself?
Open the tool